Adding Tasks and Subtasks in Sanotask
Creating and organizing tasks in Sanotask is designed to be fast, intuitive, and flexible. Whether you’re managing simple daily to-dos or complex project workflows, Sanotask helps you structure your work clearly and efficiently.
Tasks can include due dates, duration estimates, file attachments, and subtasks, allowing you to manage both small activities and larger goals within one organized workspace.
How to Add a Task
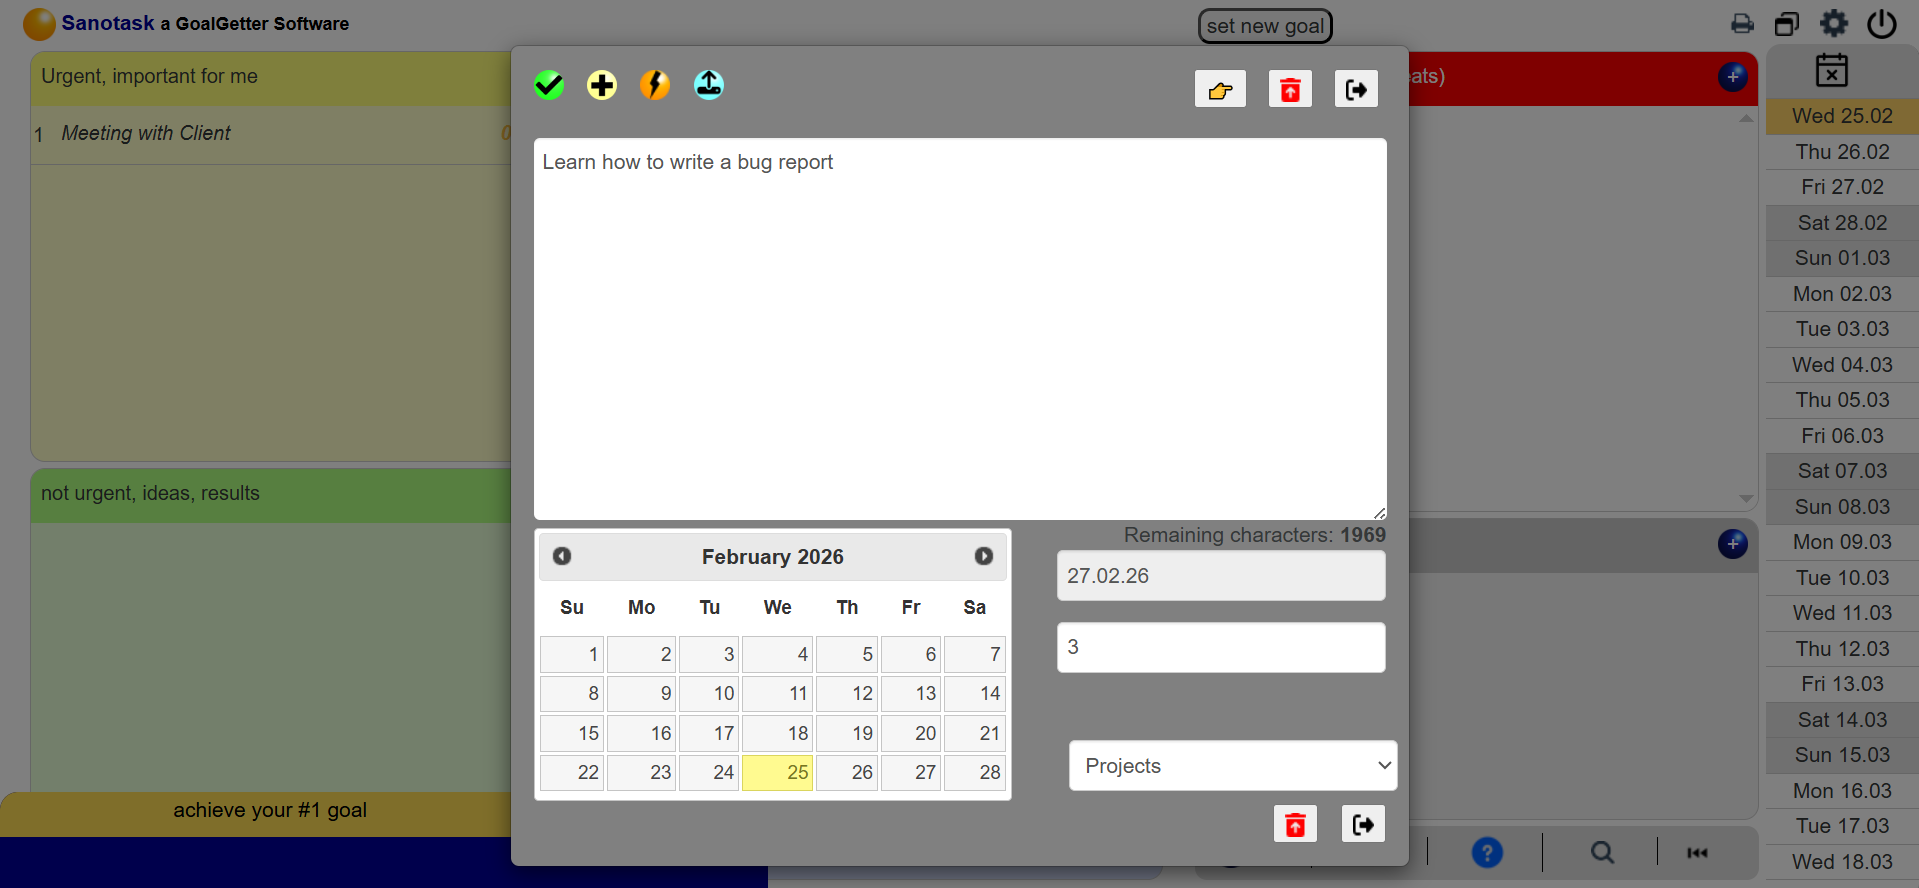
To create a new task, simply click the blue ball (+) icon on the dashboard. A task editor will open where you can enter your task details.
- Add a task name
- Set an optional due date for scheduling
- Specify the task duration by writing it at the beginning of the task name (example: “2 hours: Write project report”)
Once saved, the task appears on the dashboard with its relevant details clearly displayed.
Editing and Completing Tasks
You can easily update any task by clicking on the task name. This opens the task editor where you can modify the title, duration, or due date.
To mark a task as completed, click the checkbox next to the task. The task will turn green to indicate completion.
Completed tasks remain visible for the current day and are automatically moved to the History section the following day, keeping your workspace clean and focused.
Creating and Managing Subtasks
Sanotask allows you to break larger tasks into smaller steps using subtasks.
You can create a subtask in two ways:
- Select the main task (it will highlight in blue) and click the yellow ball to add a subtask.
- Drag one task directly onto another task to convert it into a nested subtask.
Once subtasks are created, you can expand them using the (+) icon to view, edit, or mark them as completed.
Uploading Files to Tasks
Sanotask also allows you to attach files directly to tasks. Simply click the aqua-colored ball to upload documents.
You can attach files such as PNG, JPG, GIF, XLSX, and PDF, making it easy to keep important documents connected to the task they belong to.
Deleting a Task
If a task is no longer needed, you can remove it by clicking the red delete icon. The task will be permanently deleted from the dashboard.
This simple yet powerful task system allows you to break down goals, track progress, and stay fully organized while working toward your objectives.